


Understanding the Appeal of Island Chandelier
The charm of an island chandelier transcends mere lighting; it effortlessly marries aesthetics with functionality, becoming a central design element in any space. The allure lies not only in its potential to enhance illumination but also in its ability to transform an entire room into a sophisticated haven. By seamlessly fusing style and elegance, an island chandelier undeniably serves as a focal point that enchants both the eye and the heart.
Why Choose an Island Chandelier?
Island chandeliers are particularly favored in kitchens, dining rooms, and open-concept spaces. These grand fixtures provide ambient lighting while allowing for personal expression. The decision to install an island chandelier often stems from key factors such as:
- Visual Impact: An island chandelier makes a bold statement, drawing attention and creating a sense of luxury.
- Versatility: Available in various designs, it can complement both modern and traditional decor styles.
- Enhanced Functionality: By providing ample light over a workspace or dining area, these fixtures improve both aesthetic appeal and practicality.
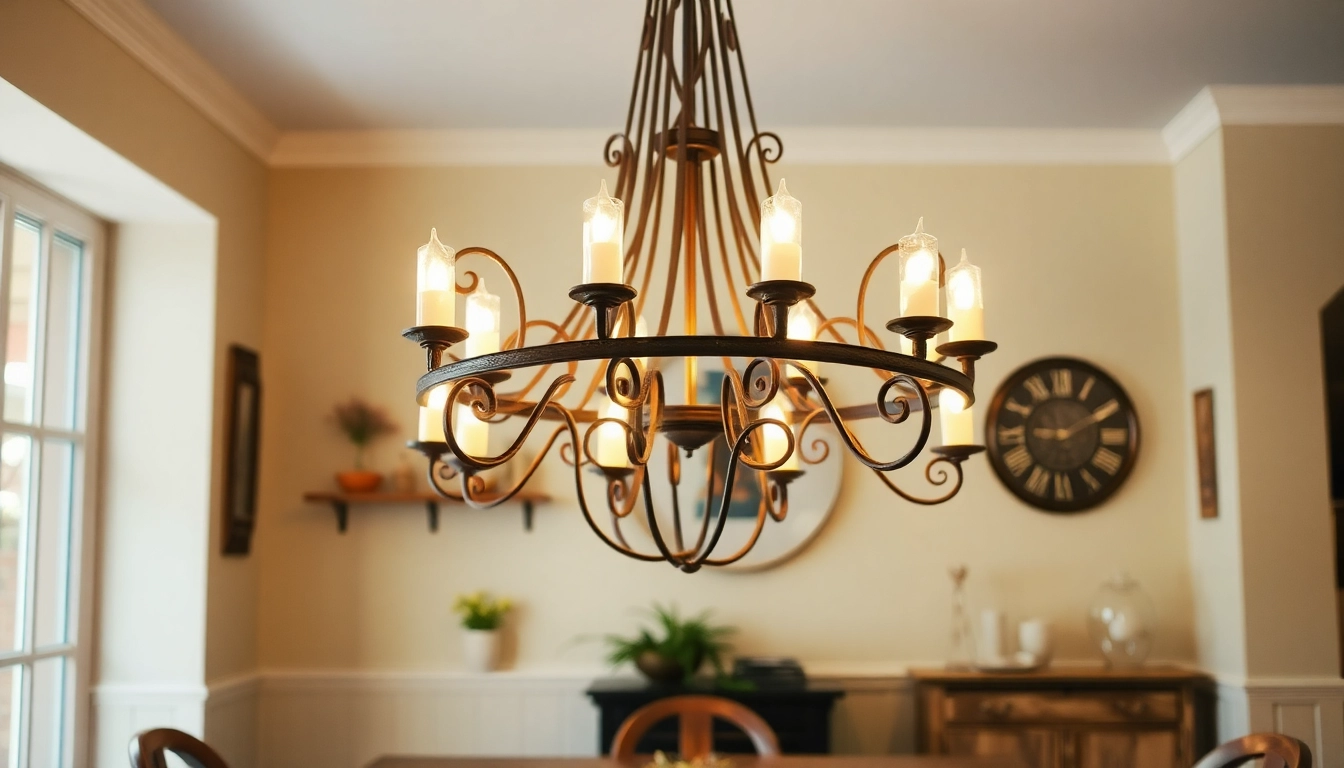
Styles of Island Chandeliers
The variety of styles available for island chandeliers is vast, allowing homeowners to select one that aligns with their personal taste and the overall aesthetic of their home. Here are some popular styles:
- Industrial: Featuring raw metal finishes and minimalist designs, these chandeliers add an edgy, urban touch.
- Rustic: Elements like wood accents and wrought iron offer a warm, inviting ambience, perfect for cozy or countryside settings.
- Modern: Sleek lines and innovative materials provide a contemporary twist, making them ideal for minimalist decor.
- Traditional: Crystal-adorned options and ornate metalwork bring elegance and timeless beauty to any room.
The Impact on Room Aesthetics
Beyond functionality, an island chandelier significantly impacts room aesthetics. Its design can help to:
- Define the space: A well-placed chandelier can distinctively highlight a zone within an open area.
- Enhance Texture: Different materials add layers and depth to the decor.
- Influence Mood: Lighting can drastically affect the ambiance; softer hues create intimacy, while bright settings foster energy and activity.
Choosing the Right Size for Your Island Chandelier
Picking the right size for your island chandelier is crucial to achieve balance and functionality. The fixture needs to enhance, rather than overwhelm, the available space.
Measuring Your Space
Start by measuring the length and width of your island or dining table. A general rule is that the length of your chandelier should be roughly two-thirds the width of the table. For example, if your table is 60 inches wide, aim for a chandelier around 40 inches wide. This proportion ensures harmony between the chandelier and the table without overpowering the surrounding space.
Recommended Height for Installation
The recommended installation height of an island chandelier can vary based on the room’s overall height. Generally, chandeliers should hang 30-36 inches above the surface of the island or table. In spaces with higher ceilings, consider additional height, ensuring the fixture does not block views or become a safety hazard. A good visual measure is that the fixture should remain at a level that allows for unobstructed conversation among those seated below.
Balancing Size and Design
Ensuring that the design complements your space is just as critical as dimensions. A smaller, ornate chandelier may look charming against a large open space, but an oversized, modern fixture could create a striking focal point in a more compact area. Always consider the room’s overall decor, and align the chandelier’s style and size to create a cohesive environment.
Best Materials for Island Chandeliers
Material selection plays a crucial role in durability, aesthetics, and overall ambiance. Different materials lend distinct characteristics to your chandelier, impacting both style and function.
Metal Options for Durability
Bronze, brass, and brushed nickel are among the most commonly used metals for chandeliers. Metal offers durability and supports a variety of styles, from contemporary to vintage looks. When selecting a metal finish, consider your existing fixtures; consistency in metal tones can unify the room’s decor.
Glass and Crystal Finishes
Glass and crystal enhance lighting quality, with their reflective surfaces creating a dazzling effect when illuminated. Crystal chandeliers can evoke grandeur, especially in traditional or formal settings, while frosted or colored glass offers a softer, modern touch. Assess which glass type aligns best with your design goals and desired ambiance.
Combining Materials for Unique Designs
Don’t shy away from exploring chandeliers that combine materials. For instance, a wood base with metal accents creates a rustic yet contemporary flair. Mixing materials allows for personalized expressions and can lead to striking focal points that draw attention while harmonizing with the overall decor.
Installation Tips for Island Chandelier
Proper installation is vital not only for the chandelier’s functionality but also for safety. Below is a comprehensive guide to successful installation.
Tools You Will Need
Before beginning the installation, gather the following tools:
- Electric drill
- Stud finder
- Wire cutters
- Screwdriver
- Wire connectors
- Measuring tape
- Ladder
- Safety goggles
Step-by-Step Installation Process
Follow this step-by-step process for installation:
- Turn Off Power: Always start by turning off the power to the existing fixture at the circuit breaker.
- Remove Old Fixture: Carefully take down the existing light fixture and disconnect the wires.
- Mount the Canopy: Attach the chandelier’s mounting bracket to the ceiling, ensuring it is securely fastened.
- Wiring Connection: Connect the chandelier’s wires to the house wires—black to black, white to white, and green or copper to ground.
- Hang the Chandelier: Lift and hang the chandelier onto the bracket, and secure it according to the manufacturer’s instructions.
- Restore Power: Turn the power back on and test your chandelier.
Safety Precautions to Consider
Always prioritize safety during installation. Ensure that you use a sturdy ladder, never work alone if heavy lifting is required, and make sure all electrical work adheres to local codes and regulations. Wear safety goggles to protect against dust and debris, and feel free to reach out to a professional if you are uncertain about any part of the process.
Maintenance and Care for Your Island Chandelier
To maintain the elegance and longevity of your island chandelier, routine care is essential. Following practical maintenance tips can keep your fixture looking as brilliant as the day it was installed.
Cleaning Techniques for Longevity
Regular cleaning is key to avoiding dust accumulation and maintaining brilliance. Depending on the materials, use a soft cloth or duster to wipe down metal parts, and a feather duster or soft brush for intricate detailing. For crystal chandeliers, a mixture of warm water and mild dish soap can be applied with a microfibre cloth. Always ensure the power is disconnected during cleaning.
Common Problems and Solutions
Be aware of potential issues such as flickering lights, which may indicate a loose connection, or a complete failure to illuminate, which might stem from a burned-out bulb or a tripped circuit. Regularly check connections and test bulbs, replacing them as necessary to maintain optimal performance.
When to Call a Professional
If you encounter persistent issues or have doubts regarding the installation or maintenance, it’s advisable to consult a licensed electrician. Complicated wiring issues or structural concerns should always be handled by professionals to ensure safety.
Frequently Asked Questions
What is an island chandelier?
An island chandelier is a lighting fixture designed to hang over kitchen islands or dining tables, providing ambient illumination and serving as a decorative focal point.
How do I choose the right island chandelier size?
The length should be about two-thirds the width of the table or island, and it should hang 30-36 inches above the surface for optimal balance and visibility.
What materials are best for island chandeliers?
Metal, glass, and crystal are popular. Metal offers durability, while glass and crystal create stunning lighting effects. Combining materials can enhance uniqueness.
How do I clean my island chandelier?
Use a soft, lint-free cloth to wipe down metal fixtures, and a mild soapy solution for glass. Always ensure the power is off before cleaning.
When should I seek professional help for installation?
If you’re uncertain about electrical work or encounter wiring complexities, it’s best to consult a licensed electrician to ensure safe installation.